Would a Text Filter Work Instead?
Before jumping headfirst into CKEditor, consider the outcome you're hoping to achieve and whether it needs to be in the text editor, or if it could be applied when rendering the text. For the latter, an easier solution may be a text filter. Text filters don't affect the editor preview, but if the logic is consistent, it can automate lots of adjustments such as:
- setting a special attribute on external links
- attaching a JS library if an image is present
- appending a trademark symbol to specific phrases
For more help on creating a custom text filter, see the how-to from Lullabot and Drupal's Filter API.
However, if you need custom tools for users to make content choices inside the text editor, then this article is for you!
This Article
Assumptions
- You have a custom Drupal module
- You can work with Javascript classes
- You can use a package manager like NPM or Yarn
Outline
- Set up your Javascript
- Configure Drupal to use your custom plugin
1. Set Up Your Javascript
Dynamic-link Library
Your package manager can be either NPM or Yarn, but the files must be compiled with Webpack. For CKEditor plugins, we need a compiler that can support a Dynamic-link Library (DLL), and as of this writing only Webpack offers this. So what are DLL's and why do we need them?
Dynamic-link Library is a concept borrowed from Microsoft that allows us to use an external library's API without including that library in our compiled code. DLL's in Javascript are represented as "manifest" JSON files that define the structure of a library: what classes and methods are exported under what namespaces.
With a CKEditor 5 DLL configured in my compiler, I can extend the CKEditor5's core Plugin class without adding the entire core library to my compiled code. Not only is this convenient: faster compiling with smaller compiled files, it is required! Because CKEditor5 is already instantiated in the text editor, any attempt to re-instantiate it with a plugin will throw a duplicated module error.
This isn't unique to Drupal either; all CKEditor plugins need to work inside a pre-existing ecosystem, only adding what's necessary. DLL's allow us to tell the compiler which resources will already be available when our plugin is activated, so the plugin can be applied without conflicts.
Dependencies
As explained in the previous section, we need to add webpack as a dev dependency. We will also need ckeditor5. Note that CKEditor uses two namespaces:
@ckeditor- actual CKEditor codeckeditor5- CKEditor5 Dynamic Link Library
We add ckeditor5 as a dev dependency to access the CKEditor 5 DLL's. Be careful depending on libraries in the @ckeditor namespace as it can result in the duplicated module error discussed above if that code has already been instantiated in the text editor.
Besides those dependencies, the rest is at your discretion. It is recommended to use Terser for code minimization, but not strictly necessary.
File Structure
Let's look at the JS folder structure inside your custom module. This is the structure that Drupal core and other major contributed modules use.
- your_module
- webpack.config.js
- package.json
- node_modules
- js
- build
- yourPlugin.js
- yourOtherPlugin.js
- ckeditor5_plugins
- yourPlugin
- src
- index.js
- src
- yourOtherPlugin
- src
- index.js
- src
- yourPlugin
- build
Webpack Configuration
The beauty of the file structure setup above, is that it keeps our compiling configuration clean and independent from the number of custom plugins and their names. Our compiler can scan the js/ckeditor5 directory for plugins and then compile each plugin folder as a single file. You can look at Drupal's CKEditor5 Webpack configuration as an example.
Start your webpack.config.js file by requiring path, fs, and webpack:
const path = require('path');
const fs = require('fs');
const webpack = require('webpack');
The latter two are used to scan the file directories with this helper function:
function getDirectories(srcpath) {
  return fs
    .readdirSync(srcpath)
    .filter((item) => fs.statSync(path.join(srcpath, item)).isDirectory());
}
Next set up the loop through the plugin file structure to set up the module exports array, which will be a list of our plugins and how to build them.
module.exports = [];

getDirectories('./js/ckeditor5_plugins').forEach((dir) => {
  const bc = { ... }; // configuration
  module.exports.push(bc);
});
Inside the bc configuration object we set the mode key to either 'production' or 'development' depending on your environment. Then the entry key is used to supply the source files of the plugin:
    entry: {
      path: path.resolve(
        __dirname,
        'js/ckeditor5_plugins',
        dir,
        'src/index.js'
      ),
    },
Note that the compiler only looks at the index.js file, so all required classes must stem from exports in that file.
Then on the other side, we have the output key to tell the compiler to build the plugins as CKEditor5 libraries and store them in the build folder:
    output: {
      path: path.resolve(__dirname, './js/build'),
      filename: `${dir}.js`,
      library: ['CKEditor5', dir],
      libraryTarget: 'umd',
      libraryExport: 'default',
    },
Finally we have the plugins key to set up the CKEditor5 DLL:
    plugins: [
      new webpack.DllReferencePlugin({
        manifest: require('./node_modules/ckeditor5/build/ckeditor5-dll.manifest.json'),
        scope: 'ckeditor5/src',
        name: 'CKEditor5.dll',
      }),
    ],
If your node_modules directory is not at the root of your module, you will need to change the manifest path accordingly.
You can see how Drupal uses the optimization, module, and devtool keys to further define the compiler. See the Webpack configuration docs for more information.
Now that the compiler is configured we can run it with either yarn webpack, npm run webpack, or by defining a webpack script in our package.json.
2. Configure Drupal to use your custom plugin
Drupal Libraries
First set up your module's library yaml file to use your compiled plugin:
- your_plugin:
- js:
- js/build/yourPlugin.js: {}
- js:
You may also want to create an "admin library" for your plugin:
- admin.your_plugin
- css:
- theme:
- css/admin.your_plugin.css: {}
- theme:
- css:
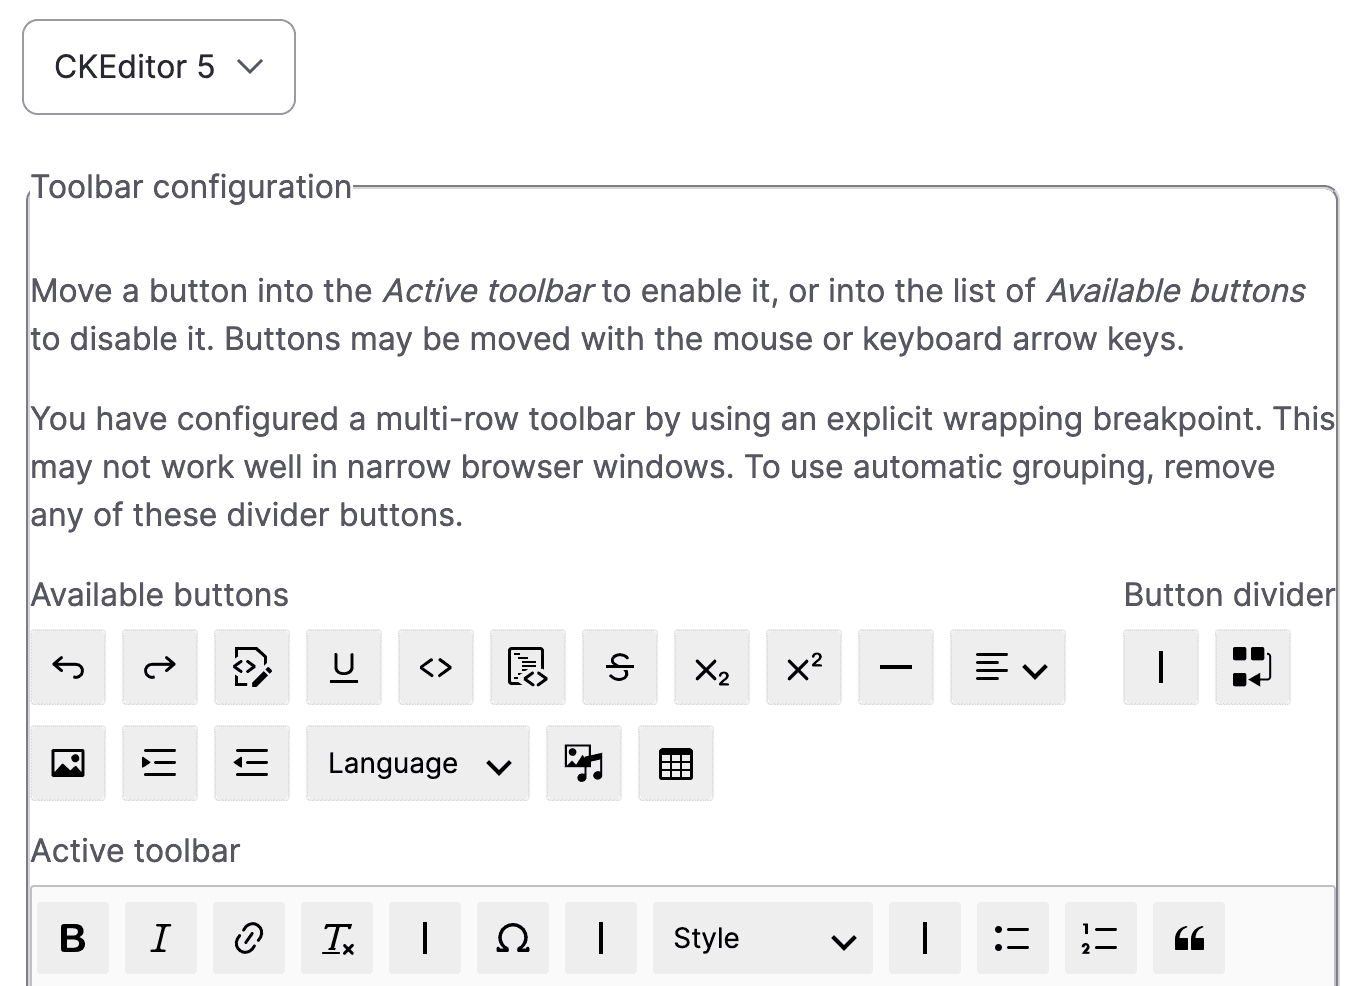
What is an admin library? This is a library used in Drupal's text-editor toolbar configuration form:

Primarily the admin library tells Drupal what icon your toolbar button should use along with any other styling preferences. Note that this is separate from the actual CKEditor interface set up in your Javascript plugin. Drupal does not parse your CKEditor JS for those styles, so we explicitly set them here for any Drupal admin forms.
CKEditor 5 Yaml
Next create a your_module.ckeditor5.yml file. This file will use Drupal's CKEditor 5 plugin API to make your custom plugin available for CKEditor text editors. For example:
- your_module_your_plugin:
- ckeditor5:
- plugins:
- - yourPlugin.YourPluginClassName
- plugins:
- drupal
- label: Your Plugin's Label
- library: your_module/your_plugin
- admin_library: your_module/admin.your_plugin
- toolbar_items:
- insertYourPlugin:
- label: Your Plugin's Label
- insertYourPlugin:
- elements:
- - <div class="your-plugin">
- ckeditor5:
So what does all this mean? The ckeditor5.yml file is broken into two major sections: Drupal and CKEditor.
CKEditor
On the CKEditor side we describe the plugins we want to add with the format file.class, where "file" is the name of the compiled Javascript file and "class" is the class name of the CKEditor Plugin object exported in your index.js file. Optionally, you can declare editor config within this section using the config key.
Drupal
On the Drupal side we declare the library containing the JS as well as the optional admin library. We also describe our custom toolbar items and the HTML elements that are required for the plugin to function. The latter is used by Drupal's "Limit Allowed HTML" filter, which will automatically allow these required elements when we add the custom toolbar item to an editor. If the toolbar item requires a configuration form inside the text-editor form or dynamic configuration, then a PHP class can be passed using the class key to provide that logic. This PHP class must have a namespace in the pattern \Drupal\{module_name}\Plugin\CKEditor5Plugin\{class_name}.
This gives Drupal all the information it needs to successfully integrate our custom CKEditor plugin into the text-editor form and the CKEditor instance itself.
